前言
- 本教程对应2022/7/8时的源码,对未来的更新不一定通用
- 为了求稳可以使用lede的稳定版https://github.com/coolsnowwolf/openwrt
固件编译
这里为了定制化自己的路由,我选择使用lede大佬的定制系统来自己编译路由固件
https://github.com/coolsnowwolf/lede
1. 按照里面的说明更新好系统的依赖和源代码,准备进行编译
# 更新依赖
sudo apt update -y
sudo apt full-upgrade -y
sudo apt install -y ack antlr3 asciidoc autoconf automake autopoint binutils bison build-essential \
bzip2 ccache cmake cpio curl device-tree-compiler fastjar flex gawk gettext gcc-multilib g++-multilib \
git gperf haveged help2man intltool libc6-dev-i386 libelf-dev libglib2.0-dev libgmp3-dev libltdl-dev \
libmpc-dev libmpfr-dev libncurses5-dev libncursesw5-dev libreadline-dev libssl-dev libtool lrzsz \
mkisofs msmtp nano ninja-build p7zip p7zip-full patch pkgconf python2.7 python3 python3-pip qemu-utils \
rsync scons squashfs-tools subversion swig texinfo uglifyjs upx-ucl unzip vim wget xmlto xxd zlib1g-dev

# 下载源代码
git clone https://github.com/coolsnowwolf/lede
cd lede- 在此处可以编译目录下的
feeds.conf.default文件,加入自己想编入固件的插件地址,这里附上我的设置
src-git packages https://github.com/coolsnowwolf/packages
src-git luci https://github.com/coolsnowwolf/luci
src-git routing https://github.com/coolsnowwolf/routing
src-git telephony https://git.openwrt.org/feed/telephony.git
src-git alist https://github.com/sbwml/openwrt-alist.git
src-git helloworld https://github.com/fw876/helloworld
src-git passwall https://github.com/xiaorouji/openwrt-passwall
#src-git video https://github.com/openwrt/video.git
#src-git targets https://github.com/openwrt/targets.git
#src-git oldpackages http://git.openwrt.org/packages.git
#src-link custom /usr/src/openwrt/custom-feed- 这里推荐三个插件库
# 可以进入对应地址查看特征库说明
src-git https://github.com/jerrykuku/luci-app-vssr
src-git https://github.com/kenzok8/openwrt-packages
src-git https://github.com/Lienol/openwrt-OpenAppFilter
2. 下载和设置
./scripts/feeds update -a
./scripts/feeds install -a
make menuconfig
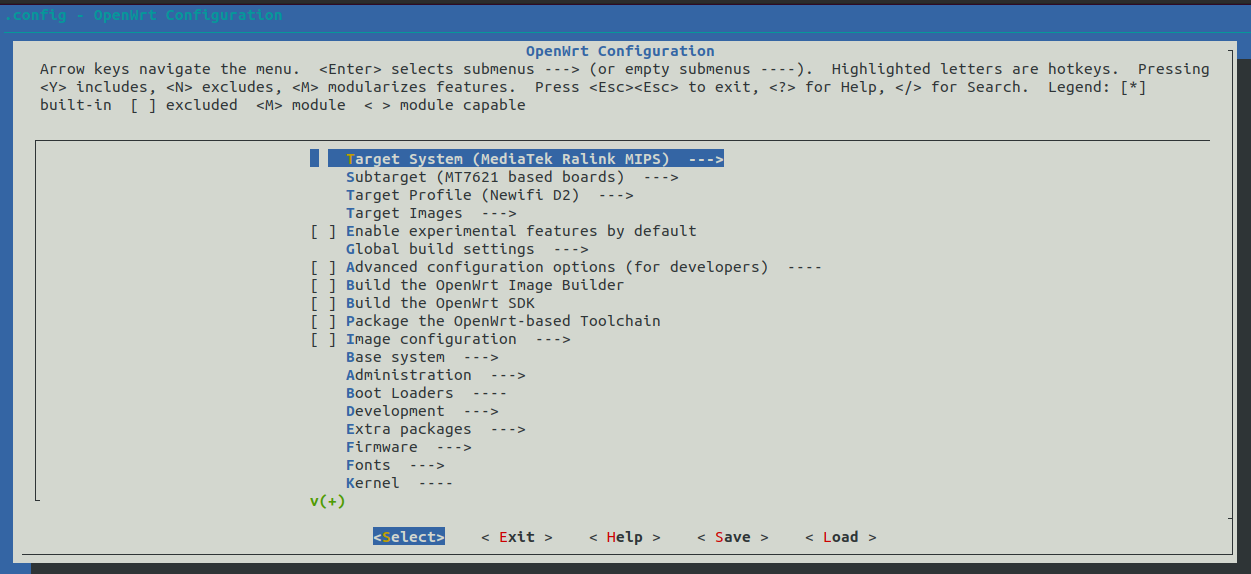
make menuconfig后会打开一个菜单进行固件的选择

2.1 内核选择
这里的前两项如上图所示,我选择的是我的Newifi3-D2路由的处理器MIPS-7621
2.2 kernel modules
kernel modules --> Filesystems 用来识别你系统能够识别的文件系统,这一步如果没有选对会导致你u盘插入无法识别,这里推荐选择
komd-fs-autofs4
komd-fs-exfat
komd-fs-ex4
komd-fs-nfs
komd-fs-vlfat
其他格式按需选择
注意,你要插入的u盘或者硬盘的分区格式不能是GPT,这里没有插件能够支持
Kenel models --> Usb Support USB口的支持,选择不正确将导致不能正常挂载usb设备
kmod-usb-storage
kmod-usb-usb2
kmod-usb-usb3
Kenel models -->naive language support 选择系统可以识别的编码,按需选择,选择不正确会导致文件名乱码
kmod-nls-utf8
2.3 Luci
- Luci --> Applocations
首先一定要选上luci-app-mtwifi
其次,这里可以随意选择自己喜欢的插件,这里是对应功能的对照表:
https://www.right.com.cn/forum/thread-3682029-1-1.html - LuCI --> Themes
可以选择喜欢的主题,关于默认主题的替换和更改在文章的最后
选择完毕后,使用方向键选择Save,将文件存为.config,后面编译将会自动根据该文件所选内容进行下载和编译
3. 下载 dl 库,编译固件
-j 后面是线程数,第一次编译推荐用单线程
make download -j8
make V=s -j1
第一次编译和下载可能要花几个小时,这里要耐心等待
编译完成后,编译得到的文件为bin/targets/ramips/mt7621/openwrt-ramips-mt7621-d-team_newifi-d2-initramfs-kernel.bin
4. 重新配置和编译
更新信息进行二次编译:
cd lede
git pull
./scripts/feeds update -a
./scripts/feeds install -a
make defconfig
make download -j8
make V=s -j$(nproc)
如果需要重新配置:
rm -rf ./tmp && rm -rf .config
make menuconfig
make V=s -j$(nproc)
路由器软破准备
- 默认你的路由器已经有了Breed,如果没有可以根据这里hackpascal的路由器破解方法刷入Breed
https://www.right.com.cn/forum/thread-342918-1-1.html
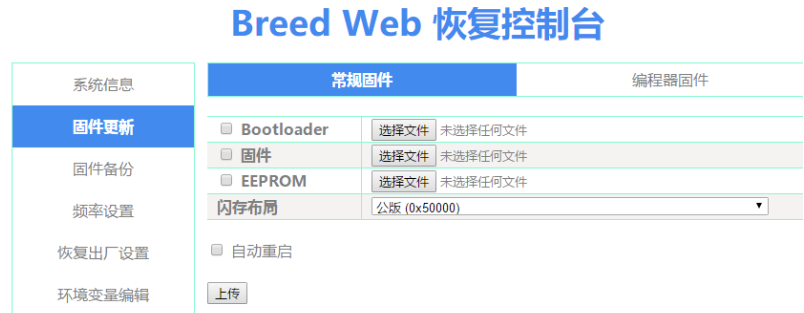
进入Breed的方法:拔掉路由器电源,按住Reset键再插入电源,待指示灯开始闪烁时松开即可,然后输入192.168.1.1进入下图界面:

在这里选择上面编译好的bin固件,待路由刷入完毕自动重启后即可。
最后输入192.168.1.1进入OpenWrt界面
默认用户名为root
密码为password
存在的一些问题
由于选择wifi默认选择的是闭源驱动,存在诸如路由器wifi重启后不能自动开启、无线设备不能桥接的Bug,这里需要通过更改/etc/config/network文件来解决,修改lan的option ifname如下,然后使用service network restart命令刷新网络,启用WiFi。
config interface 'lan'
        option type 'bridge'
        option proto 'static'
        option netmask '255.255.255.0'
        ...
option ifname 'eth0.1 ra0 rai0'- 这里 ra0 rai0就是5.8g和2.4g无线设备,加入后以后路由器重启时就会自动开启了
- 同样,由于lean版本的LuCI不甚兼容,每次修改network相关设置,上面的改动总会被覆盖导致无线断开,此时需要再编译该文件。
关于主题
- 更改默认主题
修改 feeds/luci/contrib/package/luci 下的文件 Makefile
找到主题段

替换为$(eval $(call theme,openwrt,OpenWrt.org (default)))。
# 删除自定义源默认的 argon 主题
rm -rf package/lean/luci-theme-argon

# 拉取 argon 原作者的源码
git clone -b 18.06 https://github.com/jerrykuku/luci-theme-argon.git package/lean/luci-theme-argon

# 替换默认主题为 luci-theme-argon
sed -i 's/luci-theme-bootstrap/luci-theme-argon/' feeds/luci/collections/luci/Makefile
其他一些用于Debug的补充
在linux shell中输入ifconfig可获取当前相关的interface名,常见的有:
- lo:虚拟设备端口,自身回环设备,一般指向 127.0.0.1
- ra0 rai0:成对出现,无线设备接口,对应各自的 SSID,分别是 2.4G 和 5G
- pppoe-wan:虚拟设备,他就是常见的拨号宽带上网,需要有ISP提供的用户名密码,连接后方可激活此接口
- eth0:eth0是一块物理网卡。eth0.1 eth0.2都是从此设备上虚拟出来的。eth0.1 是vlan 0分出的lan口。eth0.2 是vlan 1分出的wan口。
- br-lan 虚拟设备,用于 LAN 口设备桥接,用来使多个虚拟或物理网络接口的行为好像他们仅有一个网络接口一样。目前路由器普遍将有线 LAN 口(一般四个)和 WIFI 无线接口桥接在一起作为统一的 LAN。可以使用 brctl show 来查看使用情况。
- eth1 如果路由器有两块网卡,一般 eth1 作为 WAN 口
- wlan0 一般是无线网卡,无线端口
- wlan1 另一块无线网卡
一些建议加入的插件
# 无线加密选项
hostapd-common

# 安装驱动的参考
kmod-mt76-core - 4.14.215+2021-02-01-4ba1709c-1
kmod-mt7603 - 4.14.215+2021-02-01-4ba1709c-1
kmod-mt76x02-common - 4.14.215+2021-02-01-4ba1709c-1
kmod-mt76x2 - 4.14.215+2021-02-01-4ba1709c-1
kmod-mt76x2-common - 4.14.215+2021-02-01-4ba1709c-1
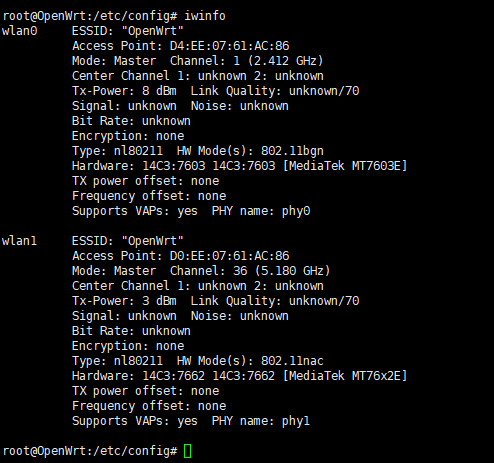
iwinfo 指令 查看连接的无线设备
